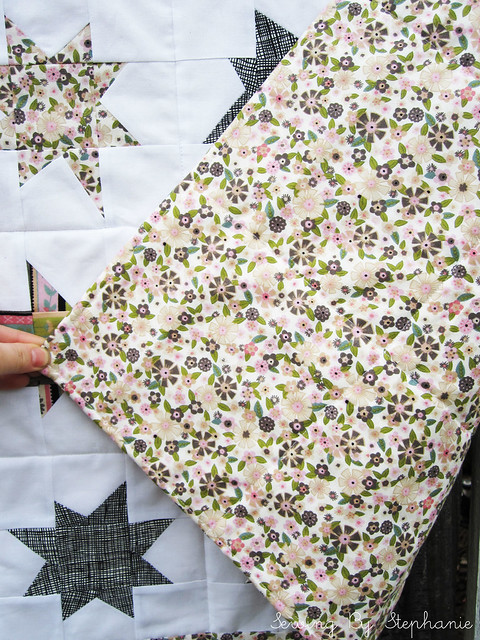
A few weeks ago I went to a baby shower for a friend who's having her first little girl next month. When she had her boy a few years ago she and I were only really acquaintances, so I didn't make a quilt for him, but now that she and I are friends I had promised her a quilt for her girl.
I picked up an awesome fabric stack from Fresh Modern Fabric on Etsy a few months ago with the intention of getting the quilt made way in advance of the shower. Well, fast forward to two weeks before the shower and that's when I actually started the quilt.
Since I was working full time I knew it would be a crunch for me to get the quilt done all by myself, so I enlisted the help of my good friend Rebeckah to tag team this one. I had already decided to do stars since I seem to be obsessed with them recently, and one evening over at Rebeckah's house we sat down to wine and a movie and figured out all the dimensions and cut our fabric.
We split the fabric and each made half of the wonky stars. I then pieces them all together into a quilt top and quilted and bound the whole thing.
It was done just in time for the shower and turned out to be super wonderful (if I can say so myself). I think this is one of my favorites so far.
Wednesday, April 11, 2012
Wednesday, April 4, 2012
House block tutorial for Stash Bee
Good afternoon guys!
I'm the queen bee of Hive 2 this month over at Stash Bee and for my block I decided on house blocks. Since we're supposed to include a tutorial in our post detailing what kind of block we want so I whipped up this one.
Hope you enjoy!
When I make a paper piecing pattern I start with a piece of paper the size of the finished block I want to make. If you want to make it easy on yourself you can use freezer paper, but in this case I used just plain scrapbooking paper because i had it on hand.
With pencil I draw the design I want to make, trying to make it as simple as possible. Since I'll be paper piecing I extend my lines all the way across the block to make sewing the seams easier.
With a pencil I add numbers in the order I plan on sewing the pieces together. I added color in photoshop to make it easier to see how I planned to assemble the block after cutting all the pieces. I plan on assembling all A pieces first, then all B pieces, then all C, D, and E pieces. Then I plan on sewing A to B to C to D then to E. (makes sense, right?)
***Very important! It will be much easier to re-assemble the block if you have an idea of where everything needs to go. You can either make a sketch of your design and include all the numbers, or if you rather you can snap a photo of your block before cutting it. This is important if you get stumped so that you can look back on it to see how it's all supposed to go together.***
The next step is to cut out all of the pieces. After cutting all the pieces I arrange them in piles by what fabrics I will use. For example: A1, A3, B1 & B3 in my sketch are all grass, so I group them together and put them with the fabric I plan to use for grass. A2 & B2 are both pathway, so I gather them together and put them with the fabric I plan to use for the pathway.
If you used freezer paper to make your design your next step is to iron the pieces to your fabric with the fabric right side up, making sure to leave a 1/4 inch allowance around all edges, since when you go to cut your pieces you'll need to include seam allowances.
If you used regular paper then it's time to find a craft glue stick. You're going to make a thin layer of glue on the back of your pattern pieces and glue them to the right side of your fabric. Trust me, the glue will hold the pattern to the fabric while you cut your pieces without causing shifting, and will release when you want to take the pattern piece off. Any reside that might be left can easily be removed with a damp cloth, or if you're patient it will come off naturally with the first wash of the quilt.
Using a ruler and a rotary cutter, cut all the pieces with a 1/4 inch seam allowance on all sides.
Once all pieces are cut, start sewing them together in their numbered order, pressing all seams as you go.
Here it is with pieces A, B & C assembled.
Fully assembled with the different sections all labeled.
All done! Sorry the pictures are a little scarce on the last few steps. I always get so excited about what I'm making I forget to take photos as I go. Anyways, hope you enjoy making your own house blocks!
-Stephanie
Tuesday, April 3, 2012
So Excited!
I'm so excited! I just bought my ticket for Sewing Summit 2012 this morning! Salt Lake City here I come!!!
Labels:
Sewing Summit
Subscribe to:
Comments (Atom)


