Thursday, August 2, 2012

August 2nd

Today is my fourth wedding anniversary.  Four years ago today I married my wonderful husband.


We're spending the day today relaxing and doing things we love, including book shopping and a round of disc golf together.  Tonight we're getting dressed up and heading to Laguna to watch the Pageant of the Masters and have a nice dinner together.

It's definitely nice to spend a day together just the two of us.

Wednesday, August 1, 2012

August do. Good Stitches Blocks

August is my first month as a quilter for the Believe circle of do. Good Stitches and I'm excited to get to choose the block.
do. Good Stitches button

When all of the blocks come in I get to quilt it and then send it off to our charity, My Very Own Blanket, based out of Westerville, Ohio.  My Very Own Blanket is "an organization of volunteers dedicated to helping children in foster care feel valued and comforted.  We connect diverse people, community groups, businesses and services as we make and deliver personalized blankets and other personal items to children in foster care."

I'm excited that the quilt we make will go to such a great cause and that a child in the foster care system will benefit from what we will lovingly create.


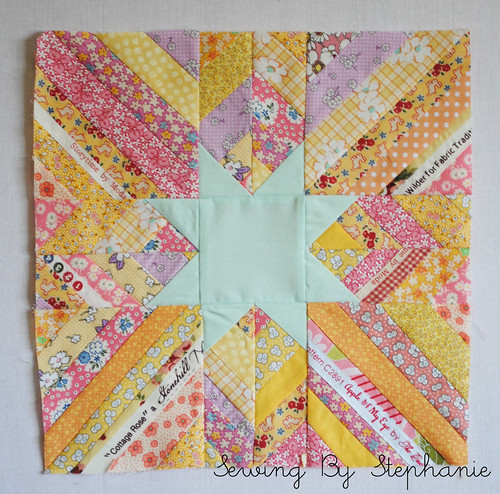
The block I've chosen for this month is the asterisk block designed by the Selvage Quilter (Karen) at the Selvage Blog.  I've asked the ladies in my circle to be as scrappy or improvisational as they want while making me two 12 1/2 inch squares.  I was inspired by this quilt that was made by the Love circle of do. Good Stitches and thought that it would be fun to make and quilt.  I love the colors the Love circle chose to use but for the Believe circle we're going to use a teal/grey/yellow combination that I came up with instead.

August do. Good Stitches Color Inspiration

I pulled fabric from my shelves and using the original asterisk tutorial as well as this tutorial about how to make the asterisks wider I came up with these:

August do. Good Stitches Asterisk Block

August do. Good Stitches Asterisk Block

The asterisk blocks were so fun to make, I might just need to make something for myself using them.  I love these colors too, so bright and sunny.

Tuesday, July 31, 2012

July Bee Blocks+ Polaroids!

July has been a busy month!

This month in addition to making all these:

July
I also made blocks for the two bees I'm in.

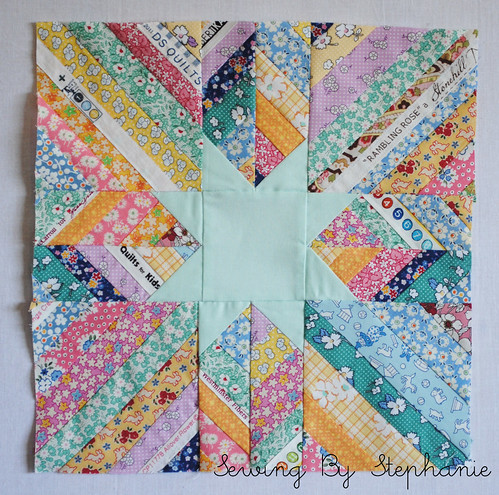
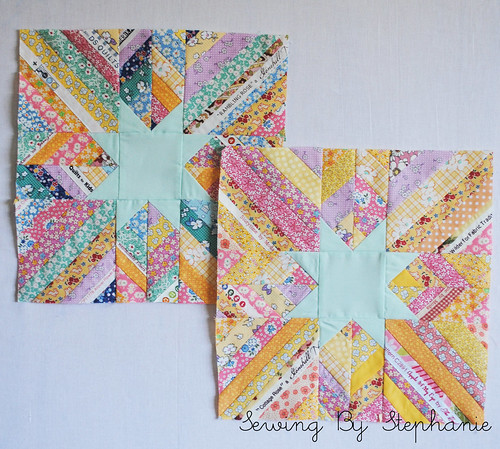
I've been in Stash Bee since February and this month Jennie asked for a string block with selvages following this tutorial she made.  I pulled some 30's reproduction prints I have and came up with these beauties:

July Stash Bee Block

2nd July Stash Bee Block

July Stash Bee Blocks

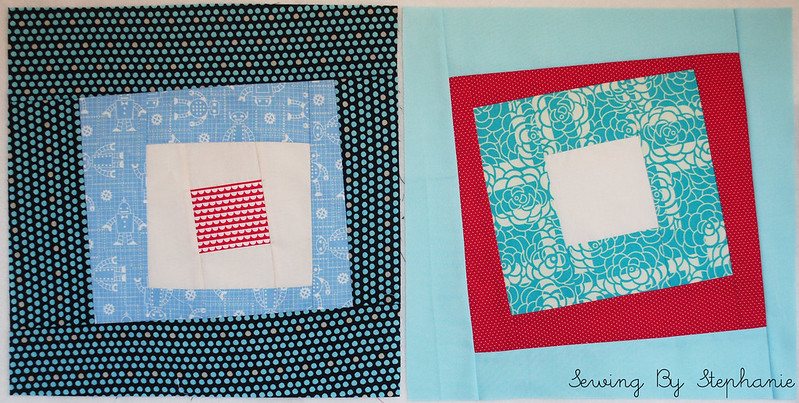
This is my first month in the Believe circle at do. Good Stitches and I had some fun coming up with combinations for the box in a box in a box design that Megan asked for.  These are what I came up with:

July Believe at Do. Good Stitches Block

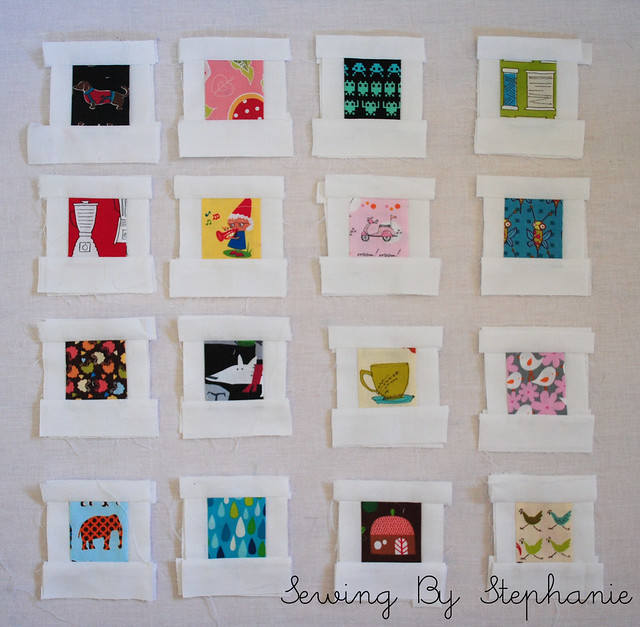
And these last guys aren't for a bee but they are for a swap!  For the *picture-perfect* Polaroid swap on Flickr I made 65 polaroid blocks to swap.  I also made one of each fabric for myself and one for my bestie Beckah, so all in all I made 130!  

*Picture-Perfect* Polariod Swap Blocks 2

*Picture-Perfect* Polariod Swap Blocks 1

I already sent my blocks in and can't wait to see what I get back.

Monday, July 30, 2012

A Birthday Quilt for Harriet

For my Mother in Law's birthday this year we celebrated by joining her on a camping trip and having a small family birthday party at the campgrounds.  She has a membership to a campground up in the desert above Banning, California that she stores her camper at so that's where we went.

It was very hot up in the desert in July (who would have ever thought so?) so we spend a lot of time in the camper playing cards and relaxing.  Well, we would have been playing cards no matter what the weather was like- that's what our family does- we play cards for money.  Not much money, none of us are rich or are big into gambling, normally at the end of the day if you've been having a good day your up 20 cents.  That kind of gambling.

Anyways I've been wanting to make her a quilt for her birthday, so that's what I did.

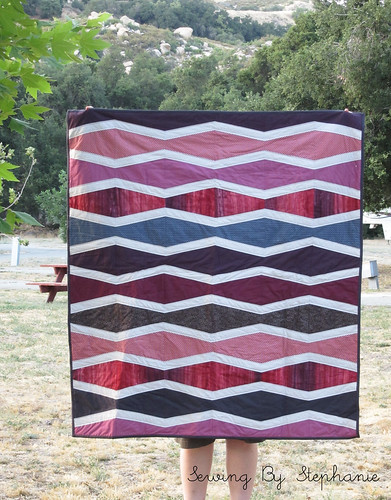
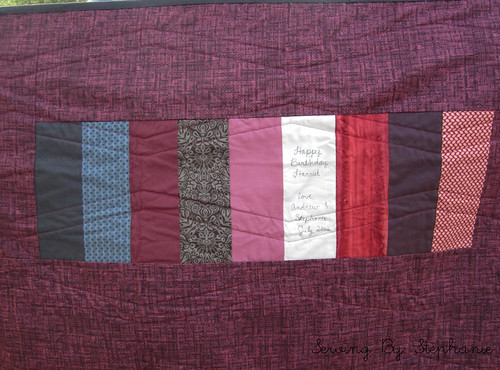
Quilt for Harriet
Quilt Front
The pattern is a free one from Elizabeth Hartman called New Waves and I made it in the lap size.  I made a smaller version earlier this month using boy fabrics, you can see that post here, and the pattern can be found here.  
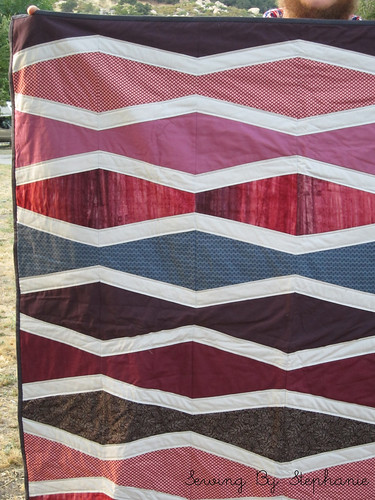
Quilt for Harriet
Detail of quilt front

 All the fabrics were ones I picked out on a shopping trip at M&L.  I started with the red batik four rows down in the quilt and then built all the other fabrics around it.  I almost didn't want to give it to her I loved it so much.
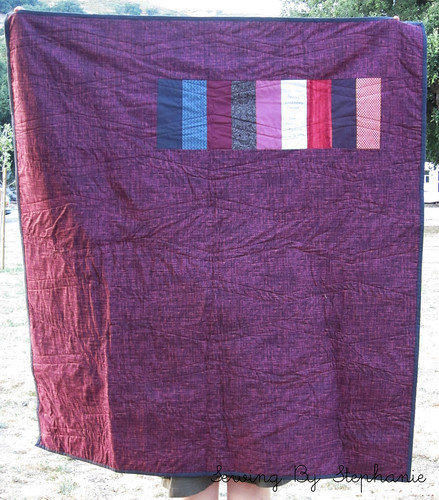
Quilt Backing
Quilt back
I quilted it pretty simply since it was a large quilt and I didn't want it to take forever.  I started by quilting lines 1/4 inch above and below each seam.  I loved the way it looked so I left it at that.  It's bound in Kona coal.
Detail of Backing
Patchwork on back
For the backing I used a purple print that I loved but thought didn't work well on the front.  I did a little patchwork for the back and included one of each of the prints on a strip to break up the huge expanse of purple.
 
Detail of Backing
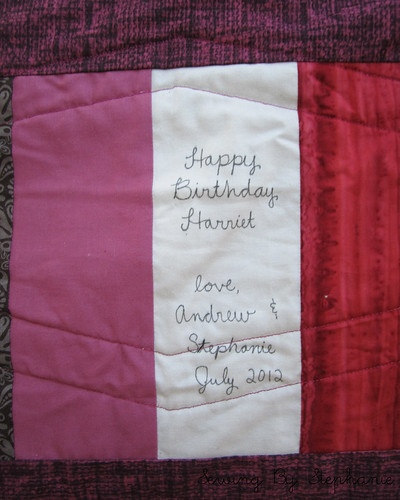
Birthday message
And of course I included a message for her on the quilt back so she always remembers who she got it from and for what occasion.

I still have a lot of the fabrics left so I'm thinking I might make myself something fun.  I could probably make a mini quilt to go in my sewing room, or possibly something for the house like a tablerunner with matching napkins.  Oh the possibilities!

Sunday, July 29, 2012

Padded Camera Pouch + Sale at Michelle Patterns!

Happy Sunday!

I wanted to pop in today to let you all know that there's a sale going on at Michelle Patterns for 20% off your purchase of $10 or more!  And hurry!  The sale ends today.  Just use the code: twozip
Michelle Patterns has some amazing patterns.  Each of them are easy to follow and result in a great product, and she just released two new patterns: the Two Zip Hipster and the Convertible Clutch.

In anticipation of going to the International Quilt Festival in Long Beach I recently made myself a Padded Camera Pouch and I love it.  A few weeks ago on a trip to M&L fabric store in Anaheim I bought myself two yards of Just Dandy by Josephine Kimberling for Robert Kaufman in the pink colorway with the idea to make travel accessories for myself to use when I go to Sewing Summit and decided that this was a good time to cut into it.

The pattern comes in 4 sizes: small, medium, large, and extra large.  Since I wanted my camera case to be big enough to also hold my phone and a few credit cards I went with the medium sized pattern.  The pattern took probably two hours or so to complete, which is not bad for me considering I had never made the pattern before.
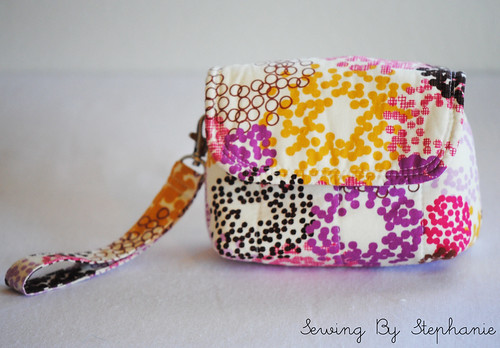
Padded Camera Pouch
Padded Camera Pouch with Strap
I made a few adjustments to the pattern, including adding a strap.  I did to by adding a D-ring onto the body of the camera pouch itself and then making myself a removable wristlet key fob strap using a swivel clasp that clips onto it when I want the bag to have a handle.
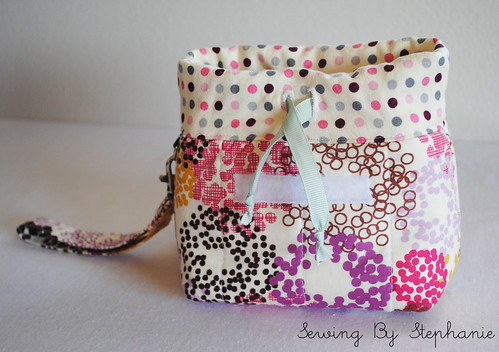
Open Padded Camera Pouch
Open Camera Pouch
The pattern also calls for an eyelet hole for the drawstring but since I didn't have one on hand I just made a buttonhole hole and it works great.
 
Closed Padded Camera Pouch
Closed Camera Pouch
The whole thing cinches up so I never have to worry about stuff falling out if the flap were ever to open while carrying it on my wrist.  
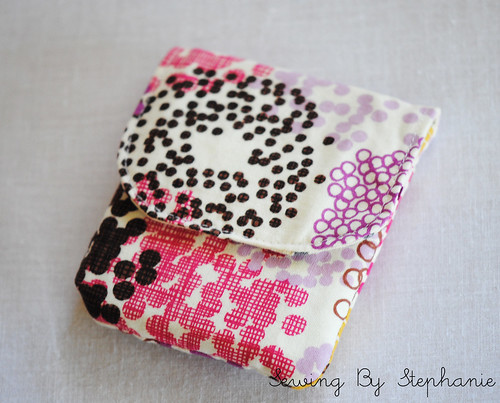
 
Closed Little Wallet
Closed Wallet
Since I wanted to carry a small wallet in my pouch to the quilt show I whipped up this little one to match.  I used the Basic Wallet Pattern that I've used before here but instead of making it full sized I made it two inches shorter.  The wallet I ended up with is just the perfect size to hold a few credit cards in the front pocket and some money in the large pocket.
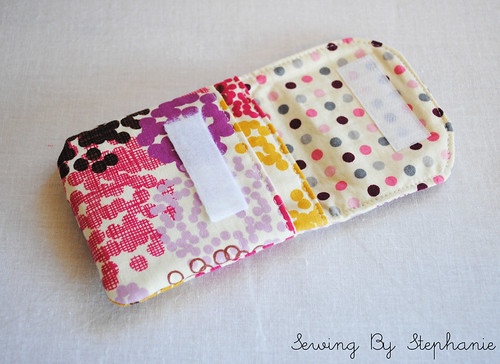
 
Little Wallet
Open Wallet
  I love the way they both came out, and am really looking forward to making myself a few more matching accessories before Sewing Summit.  I'm thinking a makeup bag, a camera strap, and maybe a duffel or tote?  Not sure yet, but I LOVE this fabric!

Padded Camera Pouch and Little Wallet
Camera Pouch and Wallet
Happy Sewing everyone!  I hope you take advantage of the last day of the sale (7/29) and stock up on some awesome patterns from Michelle Patterns.

(Fair warning: this is a sponsored post, but the opinions are 100% true and my own)

Thursday, July 19, 2012

Super Mario Bros QAL progress

Cut To Pieces

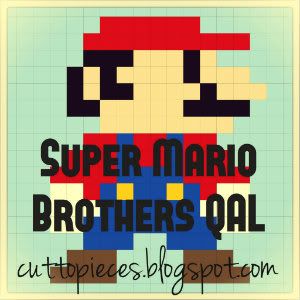
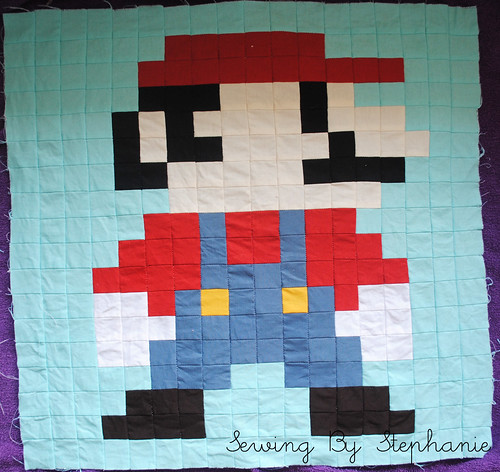
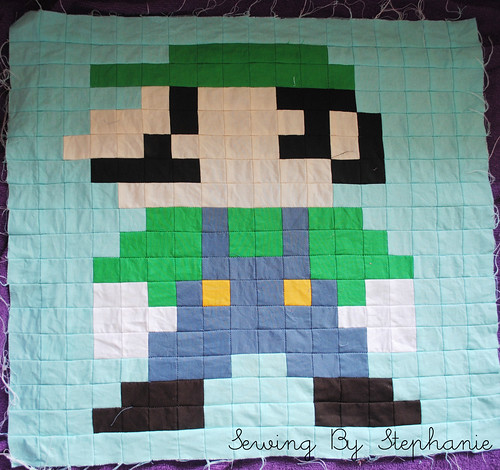
I finally got started cutting my squares for the Super Mario Bros QAL on Tuesday and yesterday I managed to whip up the first two blocks: Mario and Luigi.

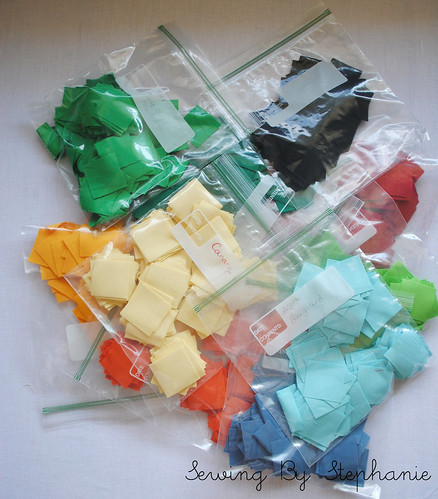
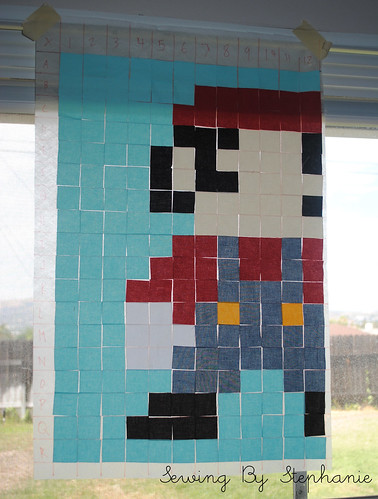
Each square starts at 1 1/2" square so when it's all sewn together the block is made up of 324 1" squares-- crazy!  I decided that to make the future blocks easier on myself I'd cut all the fabric at once and put it into zip-lock baggies.  It didn't take me that long to get all the cutting done.  I did it while watching the first two Harry Potter movies.

cut squares
Cut squares ready to go!

The method we used for piecing all the squares together fantastic. The process was new to me but I've seen it before on Oh! Fransson and Angela does a great job explaining it in the post about block construction for the QAL. 

Instead of the stabilizer she recommends (which is hard to find and pricy) I used Pellon 541 Wash and Gone along with basting spray to get the squares to stick.  After reading that another QAL member had problems drawing her grid on the stabilizer I was super careful and opted to use a washable felt tip marker rather than a pencil and had no issues with it.

Mario in-progress
Mario squares on the stabilizer

My only tips for using the basting spray it to shake your can well to get an even spray and to spray only a line or two at a time. If I tried to spray and then lay down three lines of squares I found that the stabilizer was only tacky instead of sticky, so I'd have to re-spray to get the square to stick.

When it came time to sew I also discovered that it's best not to wait. I laid down all the squares for Mario and sewed immediately and had no problems. I laid out the squares for Luigi and then waited a few minutes to sew and by the time I was finishing up I was noticing that some of the squares were starting to lift off the stabilizer.

Mario
Mario drying after having the stabilizer washed off

Luigi
Luigi drying after having the stabilizer washed off
Making these blocks was a lot of fun and very rewarding since they look pretty awesome.  They're also HUGE--they measure 18.5" square finished.  I can't wait until Angela gets more block layouts posted so I can get started on them.  This quilt is a gift for my husband and he's absolutely loving it so far.

You can check out everyone else's progress in the Flickr group.
Related Posts Plugin for WordPress, Blogger...