Sunday, December 29, 2013

Scrappy String Blocks + Bonus tutorial!

Hi everyone! January is my month as queen bee in hive 10 for the 2014 round of Stash Bee, and since I just spent what felt like forever writing a tutorial on how to make these blocks I thought I'd go ahead and share the tutorial with all of you.  Enjoy!

January Block- Hive 10: Scrappy String Block


Materials needed:
-Fabric scraps in bright fresh colors (ranging in length 12 inches to 2 inches, and in width 1 inch to 2 inches)
-White fabric measuring 4 inches by 12 inches
-Glue stick
-Scratch paper
-Pen
-Ruler

We'll start our blocks by making our templates.  We're going to be sewing our fabric strips directly onto the paper and then tearing the paper away, so it's good to use a thinner paper.  I know some people like to use pages from a phone book since they're nice and thin.  I didn't have any phone books laying around, so I just used scratch paper.


Using your ruler draw an 8 inch square.  Draw a diagonal line through the square, and then draw a dotted line 1/2 inch above and below the diagonal.


Next cut your white fabric into 4 strips 1 inch by 12 inches long.  I used Kona white, but you can use any white or off white. 

Now for the fun part! Time to pull your fabric for the strips.  I went a little overboard and this is the pile I pulled.


I then ironed the scraps and cut the fabrics into strips ranging from 1 inch wide to 2 inches wide.  I think the majority of my strips were around 1.5 inches to 1 inch wide.  I didn't worry too much about the length of the strips, I just made sure some of them were at least 12 inches long.


Now grab some strips and arrange them over the template.  You want to make sure the fabric overlaps each other and the edges a bit.  One you have the strips picked out you can stack them in order and set them to the side.


 Now take your gluestick, your template, and one of your white strips... it's time to get started. 


On the template, zig-zag your glue stick along the diagonal, filling in the spaces between the lines.  Then lay your strip on top of the glue.  (you could, of course, omit the glue and either pin your strip in place or carefully hold it in place, but the gluestick works wonderfully)


Next, grab your first strip and lay it on top of the white strip, right sides together.   You'll want to make sure that the fabric strip you're about the sew is long enough that it goes over the edges of the template where the seam will be (1/4 inch from the edge).  Check your needle placement to make sure you have a 1/4 inch seam allowance, and shorten your stitch length (I set mine to 4, where my normal stitch length is 5), and you're ready to sew.  Sew down the edge of the strip, going back and forth at the beginning and end of the strip to lock the stitches.


 Now either finger press the seam open or press using an iron. 


Grab your next strip and lay it down right sides together with edges aligned.  Sew along the edge with a 1/4 inch seam allowance.  Open and press. 


 Repeat until you've covered one side of the template.


Now grab your other stack of strips and start on the other side of the template.


Now that your template is covered it's time to trim it down to size (8 inches by 8 inches). I found it easy enough to flip the paper over and trim along the lines drawn on the front of the template.


I found the easiest way to tear the paper away from the block was to fold along each seam, and then give the block a tug to pull the paper from the seams.


The seams will all be pressed towards the outsides of the blocks as a result of pressing the block as you go.  Don't feel you need to press the seams open, having them pressed to the sides is fine.


 Now give it a good press with your iron and it's ready to go!


Now that you've made one, it's time to make 3 more!  Once you get the rhythm of how to make them down they go very quickly.  Here are six of them that I made:


****Bonus Tutorial****
How to add a selvage edge to your quilt block:
On the sixth block I made I added a selvage edge.  I thought it was fun and added an interesting aspect to the block, so I thought I'd share how I did it.
Cut the selvage strip just like any other strip, but do not cut along the finished edge of the fabric, since it's already finished :-) (I probably didn't need to say this, but I thought I'd include it just in case there was any confusion)
Start your block just like any other block.  


When it's time to add in the selvage strip, instead of laying the selvage strip right side down on top of the template and matching the seam with the strip below it, you're going to lay the selvage strip right side UP and overlap the finished edge with the strip below it. 


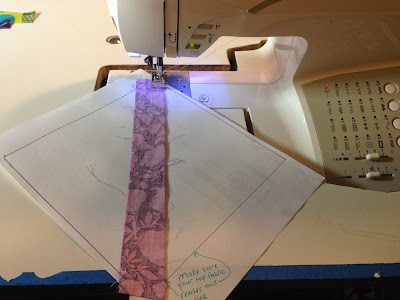
Now sew down the strip as close to the edge as you can get.  In the picture below my needle is approximately 1/8th inch (or possible even less) from the edge of the finished selvage edge.
  

Once you've sewn down the selvage edge, just continue your block following the tutorial above!

Wednesday, December 4, 2013

WIP Wednesday 12-4-2013

Wow... can anybody sad "bad lighting"?  Oh well, I don't have time to take a better shot. This is as good as it gets for now.


As you can see I've made a little bit of progress on the quilt I'm making my niece since the last time I showed it.  All of the face pieces are on but I haven't done any actual SEWING of anything yet.  I definitely missed my goal of having this done by Thanksgiving.  Instead of stressing in the sewing room I just admitted to myself that it wouldn't be done in time and allowed myself to enjoy the holiday.  Holidays and family are stressful enough without trying to add in a crazy sewing deadline.

And as proof that I enjoyed my holiday, here's an impromptu photo we snapped of our little family while we were waiting for our photo with Santa.  <3 them!


Wednesday, November 20, 2013

WIP Wednesday 11-20-2013

I have a few things to share with everyone today. 

First off are my Christmas tablerunners off of my 4th quarter finish-a-long list (#8 on the list).  I buckled down and spent a few days pebble quilting both of these, and of love the way they turned out (which I knew I would). 


And even though it wasn't on my Finish-A-Long list, after seeing photos of Better Off Thread's finished Advent calendar on Instagram I knew I had to make one.  Mine has only 12 pockets since I intend to use it during the 12 days of Christmas, but the pockets are larger so the finished product ends up being the same size as the 24 pocket version. 

As you can see I used the same fabrics from my tablerunners (and consequently the tree skirt I made last year) so everything matches, and I pebble quilted the calendar as well.  Once I have my decorations up for Christmas I'll have to take a photo to share of everything "in action".

My last thing to share is what's currently up on my design wall.  This is #3 on my Finish-A-Long list.  These are the 9 blocks for the quilt I'm making my niece (who was born yesterday-- 2 weeks early but doing great).  I have the first layer of the monster applique on but I still have to add in all the details on the faces.  I hope to get this quilt completed by Thanksgiving so my mom can hand deliver it to my sister and the baby when she goes out to meet them.  They live in Hawaii and sadly it will be many months until my husband and I will be able to meet their little girl.


You'll have to forgive the quality of the photos.  It's overcast and grey here and since that doesn't happen very often in Southern California I'm not very good at setting up lighting.  I also had to snap these photos quickly so I could write this post and hopefully get some sewing done while the baby's still napping.

Oh! And if you didn't see it my Men's Wallet Tutorial was featured on the Sew Mama Sew blog as a part of their Handmade Holidays roundup in the "Gifts for Men" post.  To check out the Sew Mama Sew post click here, to go straight to my wallet tutorial click here.

Thursday, October 24, 2013

"Be Creative" Mini Quilt + Blogger's Quilt Festival

I only have this one photo of this little beauty for now, but I thought I'd share anyway.

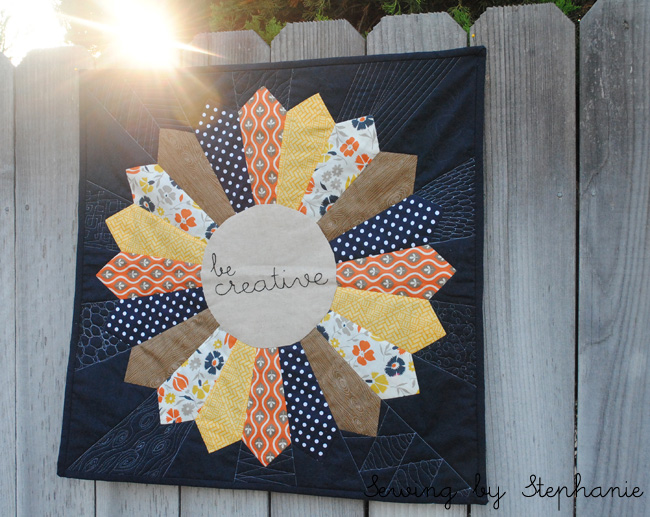
"Be Creative" Dresden Mini Quilt

This little mini quilt has been over a year in the making.  I was inspired by this quilt by Bijou Lovely (hey, she told me to be inspired).

I tried to "Be Creative" with the quilting on this one.  I used superfine 100wt silver thread from invisafil for the quilting, which is a combination of free-motion and straight line.  Each design is different, and while I used some designs I've repeated often I tried a few new ones as well.  That woodgrain quilting is my first ever attempt.

While the mini quilt might not be perfect, it makes me happy having it hanging on the wall above my computer.

Quilt Stats:
Pattern: Dresden plate, inspired by this quilt by Bijou Lovely
Fabrics: Various prints from my stash, Essex linen in Natural, Kona Indigo
Quilted: By me on my home machine with 100wt invisafil thread in silver
Dimensions: 24" x 24"
Completed: October 2013

And hey, why not?  I'm entering this little quilt in the mini quilt category of the Fall 2013 Blogger's Quilt Festival.

AmysCreativeSide

Penny's Quilt + Blogger's Quilt Festival

AmysCreativeSide


I have a quilt to share with everyone today that I'm really excited about.

You could even say that this quilt was 9 months in the making..... but not really.

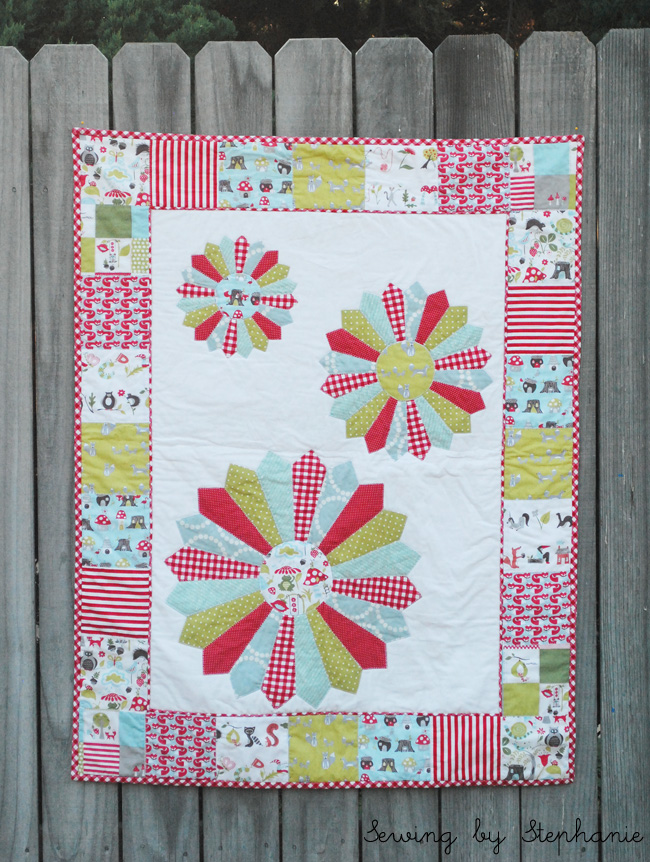
Here it is..... Penny's quilt

Penny's Quilt

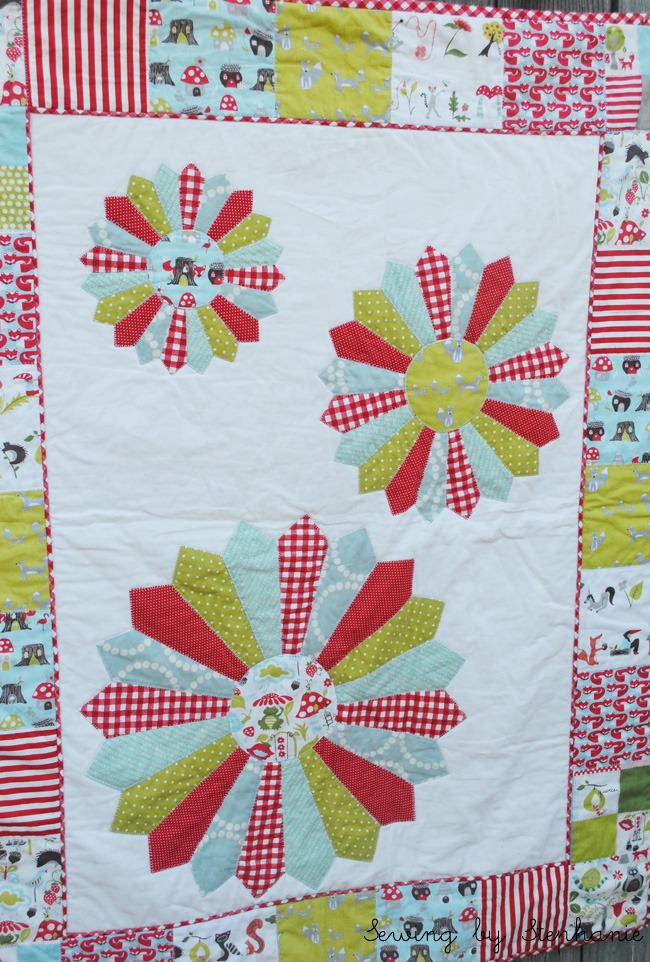
This is the quilt I made my daughter Penelope.  It's definitely the showcase of her woodlands-themed nursery and everything else in the nursery evolves around it.  This is my baby quilt entry for the Fall 2013 Blogger's Quilt Festival.

Penny's Quilt

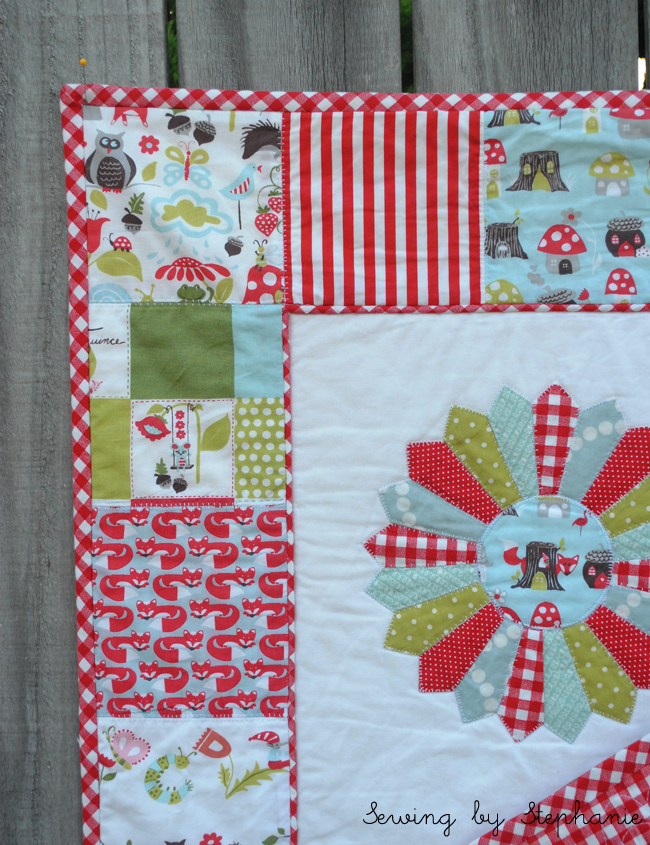
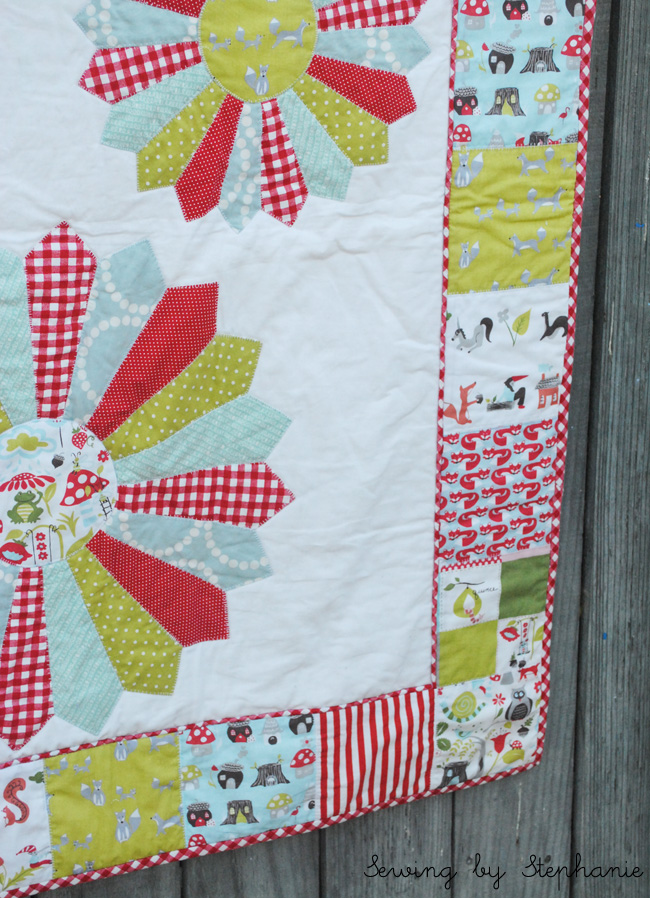
I love the colors.  SO bright and fun without reading either "boy" or "girl".  The fabric inspiration was the "Fox Hollow" line by Monaluna (which I used in the border and the centers of the dresdens),  paired with five different more basic prints.

Penny's Quilt
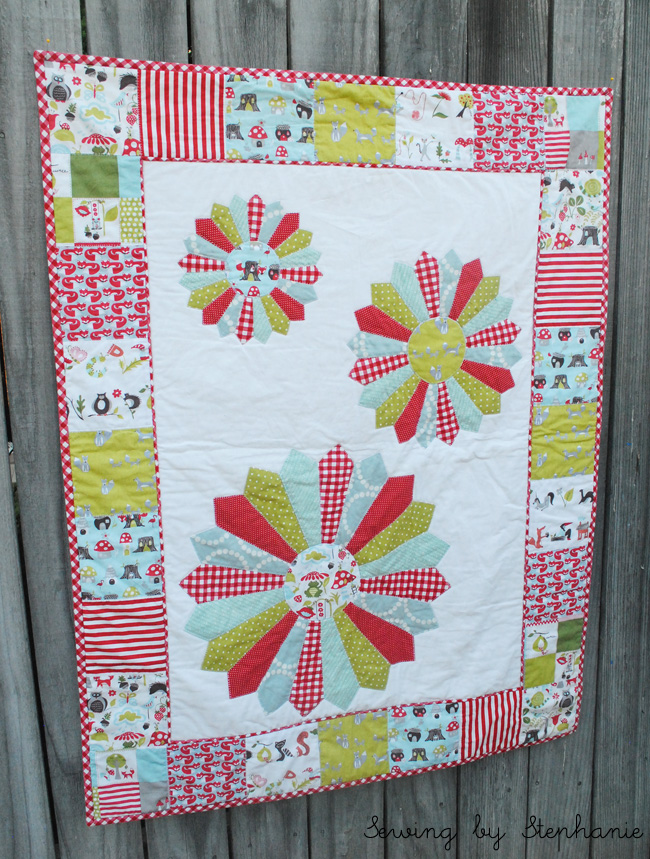
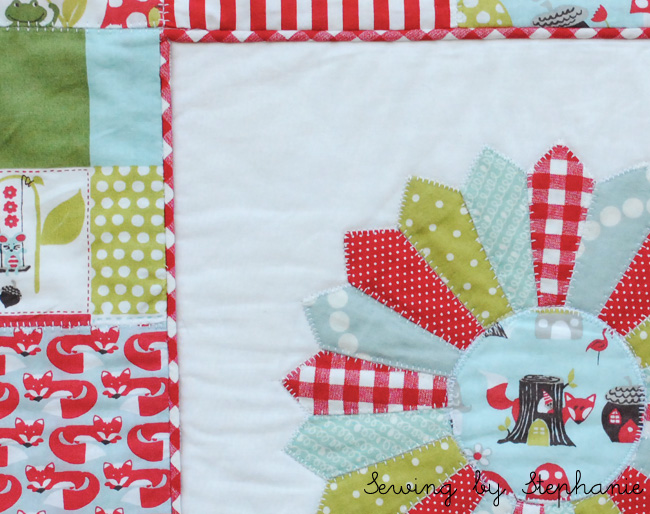
For the pattern I was inspired by this quilt by Melissa of Polka Dot Chair, but I wanted the border to be a little more fun and show off the different prints in the Fox Hollow line, and I wanted to frame the quilt a little more so I added in the gingham piping between the center panel of the quilt and the border.  It gives the quilt such fun dimension.

Penny's Quilt

I chose the fabric placement for the centers of the dresdens very purposefully.  The center of the large dresden has a frog under a flower because Penny's daddy's nickname as a child was "Toad".  The smallest dresden has a little gnome poking out of his stump house because gnomes are mommy's favorite.  The mid-sized dresden has a momma fox being followed by her two babies, with a papa fox watching, because the fox family reminds me of our family (though of course we only have one child so far).


Penny's Quilt

For the quilting, I didn't want to distract too much from the quilt top, but I did want to add a lot of free motion quilting, so I did things a little differently.... I had two layers of batting and quilted the top and back separately.  It gives the quilt a heavier weight, but since I was using fairly thin cotton batting it worked out well.  On the quilt top there's quilting around each square in the border and each spike in the dresdens.  I used the blanket stitch on my sewing machine.  The look it gives each dresden plate is fantastic.

Penny's Quilt

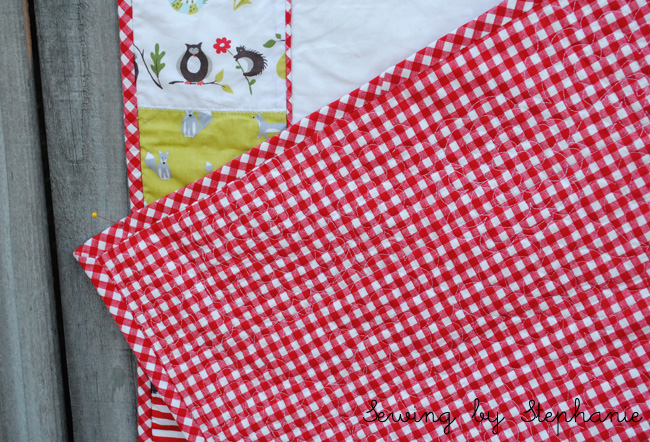
The back is quilted in an allover design with flowers.  It was quite fun to do once I got the hang of it. Once I had the back and front quilted individually I did some quilting that tied the whole quilt together.

Penny's Quilt

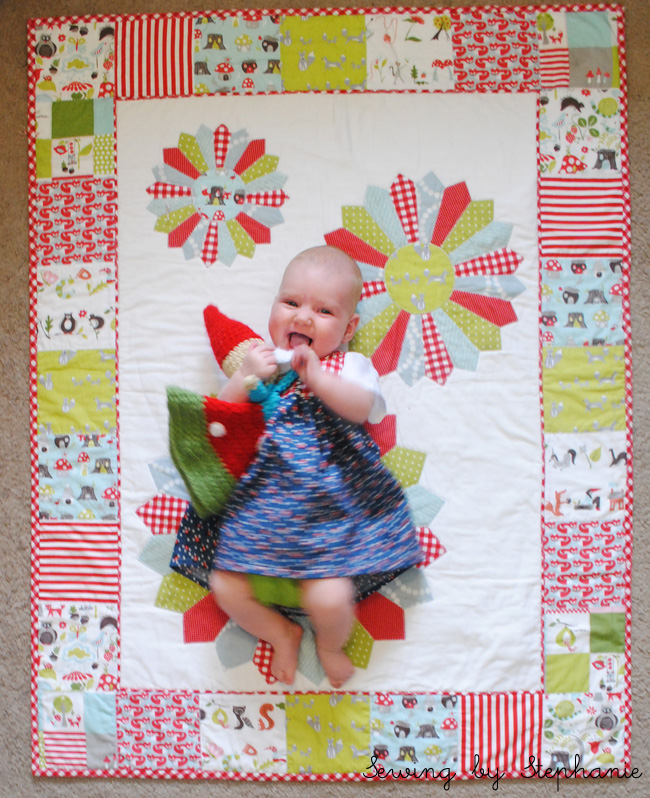
I love it and I hope it's something Penny can treasure when she's older. She was kind of cranky when I was taking these photos so she's not in any of them, but I hope to get a shot or two of her on the quilt tomorrow to share with everyone.

edited 10/25/13: The photoshoot was well worth the wait.  While I had 200+ mediocre photos of a blurry baby, all the shots were worth it to get this one perfect shot of my little girl.

Penny & Her Quilt

 She's still a little blurry and the quilt is slightly out of focus, but that smile is to die for.  (And yes, she's wearing the little mini dirndl I made her for Halloween, but I'll post about that in a few days).

Quilt Stats:
Pattern: Loosely adapted from this pattern by Melissa of Polka Dot Chair
Fabrics: Various Fox Hollow by Monaluna prints + basics in red, green, and blue
Quilted: By me on my home machine
Dimensions: 36" x 46"
Completed: March 2013

Thanks for looking, and please think of Penny's quilt (and my baby's perfect little smile) when it comes time to nominate your favorite baby quilt!

To check out my 2012 entry in the Blogger's Quilt Festival that took "favorite hand quilted quilt" check out this post.

Related Posts Plugin for WordPress, Blogger...